
So, what does it take to install a whole-home humidifier? In a nutshell, you're mounting the unit to your furnace's ductwork, tapping into a water line, and wiring it into the furnace controls. This is how it adds moisture to the air that gets pushed through your entire home, giving you consistent comfort everywhere. For the handy homeowner, it's definitely a doable weekend project, but you'll need to be comfortable with some basic plumbing, electrical, and sheet metal work.
Why Your West Michigan Home Needs a Humidifier
If you're living in West Michigan, you know the drill. That bone-dry, harsh air settles in around November and doesn't let up until April. When your furnace in Hudsonville or Jenison finally kicks on for the heating season, it does a great job warming the house, but it also strips all the essential moisture out of the air. This isn't just a small comfort issue—it's a real problem that can affect your health, your comfort, and even the wood in your home.
Believe it or not, the air inside a typical home in Grandville or Walker can get drier than the Sahara Desert during the winter. We've seen humidity levels drop below 20%, which is a far cry from the 30-40% range that’s considered ideal for both health and comfort.
The Problem with Dry Indoor Air
That dry winter air is more than just an annoyance. It creates very real problems for homeowners all over our service areas, from Standale and Allendale to Wyoming, Michigan. You've probably felt the effects yourself without even realizing the cause.
- Health and Comfort: Ever notice your skin getting itchy, your lips chapping, or your throat feeling scratchy all winter? That's the dry air. It also dries out your nasal passages, leaving you more vulnerable to colds, the flu, and sinus infections.
- Damage to Your Home: Wood is like a sponge; it absorbs and releases moisture from the air. When the air is too dry, it sucks the moisture right out of your hardwood floors, furniture, and cabinetry. This causes the wood to shrink, warp, and even crack over time.
- Static Shock Everywhere: Those little zaps you get every time you touch a doorknob or pet the dog? That's a direct result of low humidity. It's a minor nuisance, but it's also a dead giveaway that your indoor air is way too dry.
A whole-home humidifier is hands-down the best fix. It works directly with your furnace, so unlike a portable unit that just helps one room, it delivers balanced humidity to every single corner of your house. It’s about protecting your entire investment.
A Smart Upgrade for Your Heating System
While this guide will walk you through the nitty-gritty of installing a whole-home humidifier, it's important to see the bigger picture. By adding moisture back into the air your furnace is already circulating, you're creating a genuinely healthier and more comfortable place to live. It's a simple upgrade that can make those long West Michigan winters (November through April) so much better.
If you're interested in other ways to improve your home's environment, you can learn more about our comprehensive indoor air quality solutions that go beyond just humidity. At the end of the day, a project like this doesn't just improve your daily life—it helps preserve the value of your home.
Choosing the Right Humidifier for Your Home
Before you even think about cutting into your ductwork, picking the right whole-home humidifier is the most important decision you'll make. This isn't just about grabbing a box off the shelf; it's about matching a system to your home's unique needs. This is especially true given the bone-dry winter months we get here in West Michigan from November to April.
Getting this choice right from the start will save you a world of headaches down the road.
More and more homeowners are catching on that whole-house systems are a far better solution than those little portable units. In fact, these systems are on track to outpace portables with an 8.27% growth rate through 2031, as retrofitting becomes the norm. During a harsh West Michigan winter, when indoor humidity can easily drop below 30%, a professionally installed system can prevent up to 70% of common dry-air issues—think cracked drywall or a piano that won't stay in tune. You can dig deeper into the latest humidifier market trends to see why they're becoming so popular.
Comparing Humidifier Types
Your choice really boils down to three main types of whole-home humidifiers. Each has its own strengths and is a better fit for different homes and budgets, whether you're in Walker or Wyoming, Michigan. Understanding the real-world differences is your first step toward a successful install.
- Bypass Humidifiers: These are the workhorses. They're the most common and generally the most affordable option you'll find. They hook into your furnace's ductwork and use the main blower to push air through a moist pad, adding humidity as the air circulates. Simple, effective, and reliable.
- Fan-Powered Humidifiers: Think of these as a step up from the bypass models. They still use a moist pad, but they have their own fan built-in. This means they can generate more humidity without relying solely on your furnace kicking on, making them a great mid-range choice.
- Steam Humidifiers: This is the top-of-the-line option for anyone who needs precise humidity control. Instead of just evaporating water, steam units actively boil it to create steam, which is then injected right into your airflow. They can hit an exact humidity level and work whether your furnace is running or not.
To make it even clearer, here’s a quick breakdown to help you compare your options for your home.
Whole Home Humidifier Type Comparison
| Humidifier Type | Best For | Installation Complexity | Typical Cost (Unit + Install) | Pros | Cons |
|---|---|---|---|---|---|
| Bypass | Budget-conscious homeowners with standard furnaces and enough space for a bypass duct. | Moderate | $500 – $1,000 | Most affordable, low maintenance, very reliable. | Needs the furnace fan to run, less output than other types. |
| Fan-Powered | Homes needing more humidity or where running a bypass duct isn't practical. | Moderate | $700 – $1,500 | More efficient, higher output, flexible installation options. | Higher upfront cost, needs a dedicated electrical outlet. |
| Steam | Large homes, or those with precise needs (like for instruments, art, or health). | High (Pro Recommended) | $1,500 – $3,000+ | Highest output, works independently of heat, ultra-precise. | Most expensive, more complex maintenance is required. |
Ultimately, the best choice depends on what you're trying to achieve, from basic comfort to protecting valuable wood furniture and flooring.
Your Pre-Installation Tool and Material Checklist
Once you've picked the perfect humidifier for your home in Hudsonville or Jenison, the next move is to gather your supplies. Trust me, nothing kills the momentum of a project faster than having to make multiple trips to the hardware store. Before you start, lay everything out and make sure it's all there.
Pro Tip: I always recommend laying out all your tools and materials on a drop cloth near the furnace. It keeps everything organized, protects your floor, and gives you a final chance to see if you've forgotten anything before you make the first cut.
Essential Tools:
- Safety First: Don't even start without safety glasses and a good pair of work gloves.
- Measuring & Marking: You'll need a tape measure, a permanent marker, and a level.
- Cutting Metal: A quality pair of tin snips (aviation snips) is a must for clean cuts in your ductwork.
- Drilling: Have a power drill ready with a range of bits, especially one designed for sheet metal.
- Fastening: Grab your screwdrivers (both Phillips and flat-head) and an adjustable wrench.
- Wiring: You'll need wire strippers and crimpers for the low-voltage electrical work.
Required Materials:
- Your chosen whole-home humidifier kit (this should come with the main unit, humidistat, and a saddle valve).
- A handful of sheet metal screws to mount the unit securely.
- Duct sealant or high-quality foil tape to make sure every connection is airtight.
- Low-voltage thermostat wire (usually 18-gauge, 2-conductor is what you'll need).
- Copper or plastic tubing for the water supply line.
- Vinyl tubing for the drain line.
The Core Steps of a Humidifier Installation
With your tools laid out and the right humidifier picked for your home, it’s time to get your hands dirty. This is where the project really comes to life. We’ll walk through the mechanical side of things for a bypass or fan-powered unit, hitting all the most critical physical steps. From picking the perfect spot on your ductwork to cutting the metal and mounting the unit, every phase is key to a leak-free, efficient system.
But before you even think about touching a tool, your very first move is all about safety. Head to your home's main electrical panel and kill the power to your furnace. Don't just flip a switch or trust the thermostat—find the dedicated breaker and shut it off completely. This isn't just a friendly tip; it's a non-negotiable step to avoid getting seriously hurt.
This quick chart lays out the initial prep work, from comparing models all the way to getting your workspace ready.
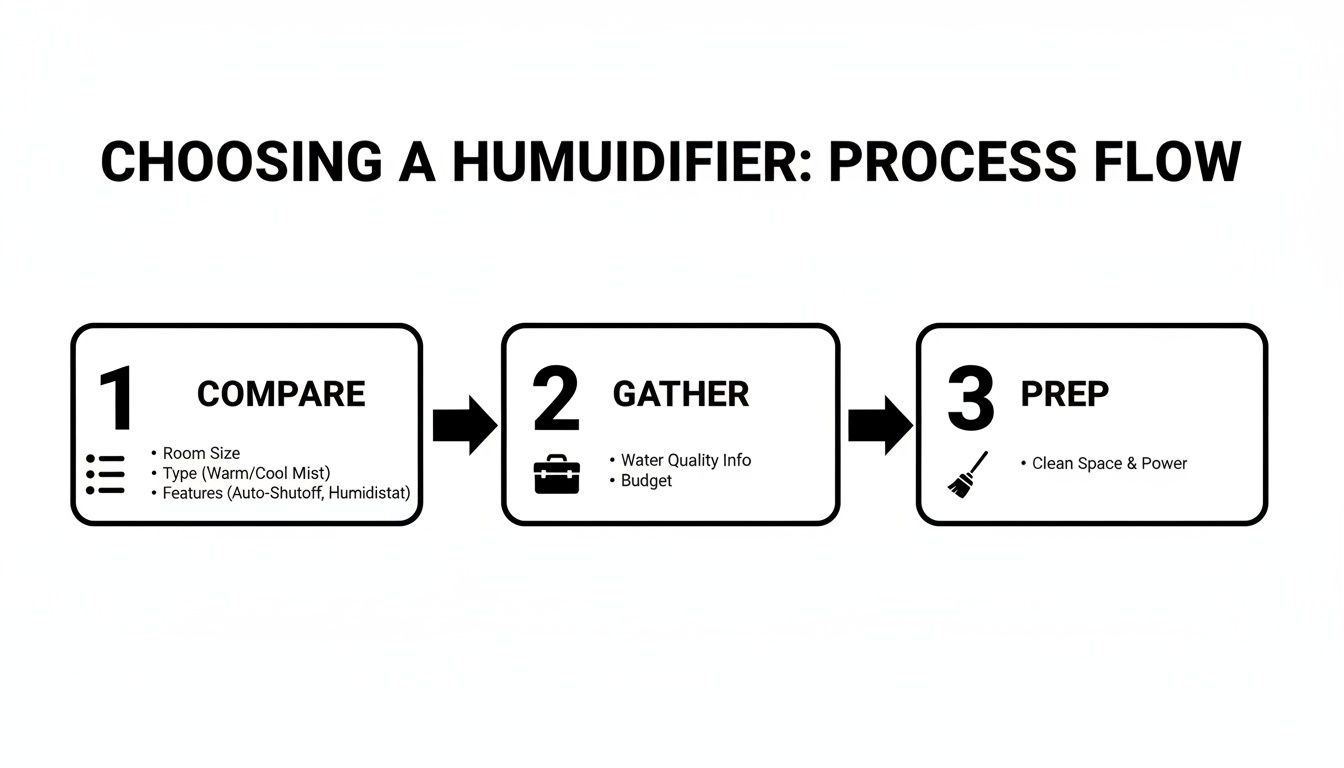
Think of this as a reminder: a successful installation starts long before you ever cut into your ductwork. It's all about the prep work.
Finding the Perfect Mounting Location
The first real decision you have to make is where this thing is actually going to live. Your humidifier will mount on either the supply plenum (the big duct carrying warm air away from the furnace) or the return plenum (the one bringing cool air back to it). Check your manufacturer's instructions—they'll tell you the ideal spot, and you should always follow their lead first.
For most bypass models, you'll put the main unit on the supply side and then run a smaller bypass duct over to the return. Fan-powered units also typically go on the supply plenum, but they don't need that big bypass duct, which gives you a bit more flexibility in crowded basements.
Here’s what you're looking for when scouting a location:
- Accessibility: Pick a spot where you can easily get to the unit to change the evaporator panel once a year. Don't jam it into a corner where you can't even open the cover.
- Clearance: You need a few inches of flat, clear ductwork on all sides. Watch out for seams, screws, or anything else that could get in the way.
- Proximity: The location needs to be reasonably close to a water line and a floor drain. This will make the plumbing connections we'll tackle later much, much easier.
Once you’ve found the sweet spot, grab the paper template that came in the box and hold it against the duct. Use a level to make sure it's perfectly straight, then trace the outline with a permanent marker. Getting it level isn't just for looks; it ensures water flows correctly over the evaporator panel inside.
Cutting the Duct and Mounting the Unit
This is the part that usually makes DIYers a little nervous, but with the right tools, it’s pretty straightforward. Before you make a single cut, do a quick double-check to make sure there are no hidden wires or pipes inside the duct right where you're about to work.
Start by drilling a pilot hole in one corner of your traced outline—make it just big enough to get the tip of your tin snips in. Now, carefully cut along the marker lines. Go slow, wear your gloves, and try to make the cuts as clean as you can. The edges of freshly cut sheet metal are extremely sharp.
With the opening cut out, you're ready to mount the humidifier. Fit the unit's housing into the hole you just made. Use your level one last time to confirm it's straight, then grab your self-tapping sheet metal screws. Drive them through the pre-drilled holes in the humidifier's frame and into the surrounding ductwork. Most units need about four to six screws to be held securely.
Pro Tip for West Michigan Homeowners: During our cold winter months from November to April, the temperature difference between your basement and the heated air in the plenum can be significant. After mounting, run a bead of high-quality duct sealant around the entire perimeter where the unit meets the ductwork. This creates an airtight seal that foil tape alone can't always guarantee, preventing air leaks and maximizing efficiency for your heating system in Hudsonville or Jenison.
Installing the Bypass Duct
If you’re working with a bypass humidifier, the next task is connecting the bypass duct. This smaller duct lets air travel from the supply side, through the humidifier's water panel, and back into the return plenum, picking up moisture on its journey.
You’ll need to cut a circular hole—usually 6 inches in diameter—in the opposite plenum. So, if you mounted the main unit on the supply duct, this hole goes on the return duct. Use the starting collar from your kit as a template to trace a perfect circle.
To cut the round hole, you have a couple of options. You can drill a series of small holes around the inside of the circle and then punch out the center, or you can use a pair of curved tin snips (sometimes called "duckbill" snips) for a much cleaner cut.
Once the hole is ready, pop the bypass duct collar into the opening. Secure it with a few sheet metal screws and seal the edges with either duct sealant or foil tape. Now you can connect the flexible bypass duct. Stretch it between the main unit and the collar you just installed, sliding it over both ends. Secure it tightly at each connection point with the provided clamps or even a couple of sturdy zip ties. Try to keep the duct as straight as possible, avoiding any sharp bends or kinks that could choke off the airflow. This ensures your furnace in Grandville or Walker can breathe easy.
With the main components physically in place, you're ready to move on to the next critical phase: the wiring and plumbing.
Connecting the Wiring and Plumbing Like a Pro
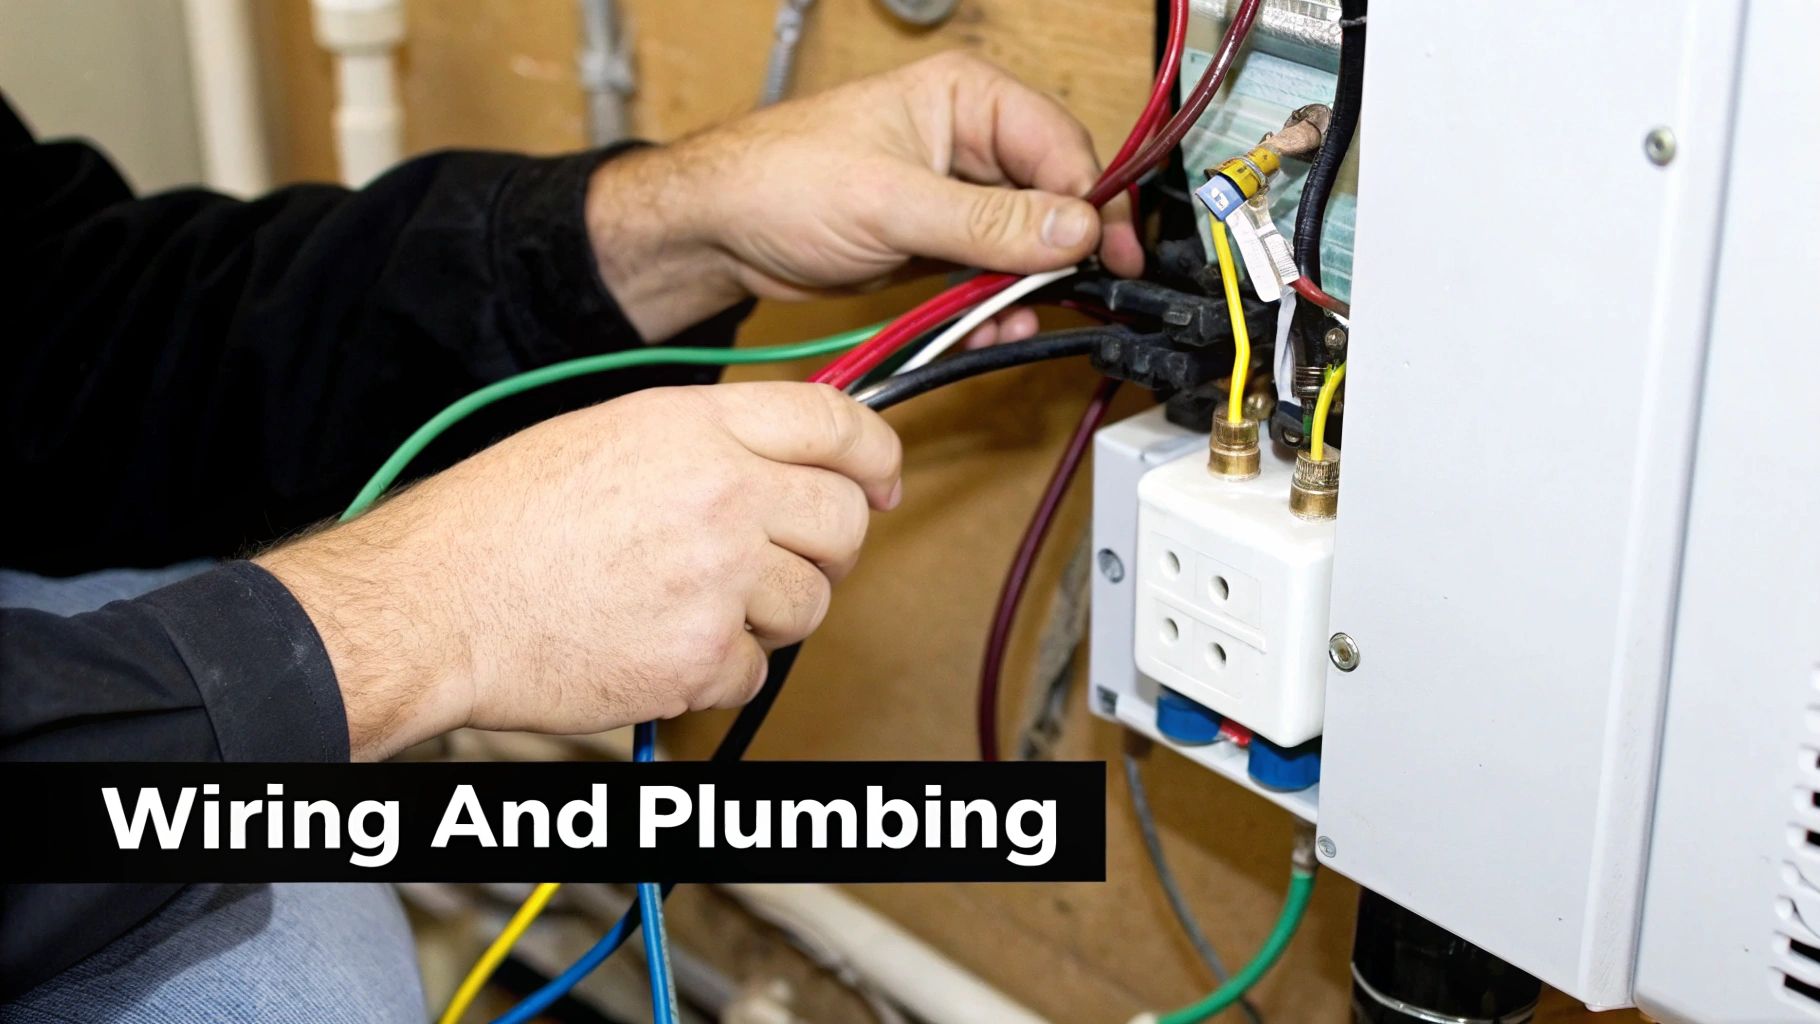
This is where the rubber meets the road—and where many DIY projects come to a screeching halt. For homeowners in Standale or Allendale, the idea of messing with your home's electrical and plumbing systems can feel pretty daunting. Let's break it down into manageable pieces, with a laser focus on safety and doing the job right.
The goal is pretty straightforward: get the humidistat wired up so it can tell the humidifier when to kick on, and then give the unit a water supply so it can actually do its job. We're talking low-voltage here, but that doesn't mean we can be sloppy. Precision is everything.
Always remember, your furnace manual and the humidifier's instructions are your two best friends for this part of the project. They will have the exact diagrams for your specific models. The steps I'm walking you through cover the general principles that apply to most setups you'll encounter.
Handling the Low-Voltage Wiring
Think of the humidistat as the "brain" of your new system and the low-voltage wire as its "nervous system." We need to connect them so the humidifier only runs when your furnace blower is actually pushing air through the ducts. Running it any other time is a great way to waste water and electricity.
First, get that humidistat mounted. A good spot is on the return air plenum, about a foot upstream from the humidifier unit. This gives it a solid, accurate reading of the air coming back from your living space. Run your 18-gauge thermostat wire from the humidistat over to the furnace, leaving yourself a little bit of slack.
Now, pop open your furnace's service panel. You're looking for the control board—the command center of your HVAC system. Scan the board for a set of terminals specifically labeled "HUM" or "24V". These are put there just for accessories like humidifiers and only get power when there's a call for heat during the winter heating months.
- Connect one of the two wires from your humidistat to that "HUM" or "24V" terminal.
- The second wire connects to the "C" or "COM" (Common) terminal on the board.
What if your furnace board doesn't have "HUM" terminals? You’ll need a current-sensing relay or a sail switch. These are little devices that can tell when the blower fan is running and will close the circuit to power the humidifier. But honestly, most modern furnaces have dedicated "HUM" terminals.
Crucial Safety Warning: Before you even think about touching a wire, go to your breaker box and shut off the power to the furnace. Double-check it. Triple-check it. Even though it's low voltage, you're working right next to high-voltage components. If you have even a shadow of a doubt, this is the moment to stop and call a professional. It’s simply not worth the risk.
Making the Plumbing Connections
With the electrical side sorted, it's time to get some water flowing. This almost always means tapping into a nearby water pipe—and trust me on this, tapping into the hot water line is the way to go. Hot water evaporates much more efficiently, which boosts your humidifier's output and seriously cuts down on the mineral scale that clogs up evaporator pads.
The easiest and most common way to tap into a copper or PEX pipe is with a saddle valve. This clever little device just clamps onto the pipe. When you tighten its handle, a small pin pierces the pipe, giving you a water connection without any cutting or soldering.
Here’s how you do it:
- Pick Your Spot: Find a straight, easy-to-reach section of the hot water pipe.
- Attach the Valve: Clamp the saddle valve on tight, making sure the rubber gasket is sitting perfectly flat against the pipe.
- Pierce the Pipe: Slowly turn the handle clockwise. You'll feel a little resistance and then a "pop" as it punctures the pipe. Stop there—don't crank it down.
- Connect the Tubing: Attach the small 1/4-inch supply tubing (usually copper or plastic) to the saddle valve and run it over to the humidifier's solenoid valve.
Last but not least, connect the drain line. This is a simple vinyl tube that attaches to the bottom of the humidifier. Just run this tube downhill to a floor drain or condensate pump. Make absolutely sure there are no kinks or upward loops in the line; it's a gravity-fed drain, and any blockage will cause a leak. And trust me, you don't want water damage around your furnace.
It's no surprise these systems are getting more popular. The whole-house humidifier market is expected to see a 9% growth rate through 2027. This boom is all about their efficiency and low-maintenance design. As noted by Global Market Insights, these units wire right into your HVAC system and connect to your plumbing, giving you whole-home comfort without the hassle of refilling portable units. However, they also found that improper DIY installs can lead to water damage in about 15% of cases, which really highlights the need to be careful. You can read more on the growing air humidifier market to see why this is a top home upgrade.
If your furnace is on the older side or the wiring looks like spaghetti, calling in a pro might be the smartest and safest move. You can learn more about our expert furnace installation services to see how we handle these critical connections with professional precision.
Final Testing and Long Term Maintenance
With the humidifier physically installed, you're in the home stretch. But don't pop the champagne just yet. The final checks and initial power-up are probably the most important steps to make sure all your hard work pays off. This is where you double-check every connection and dial in the settings for those brutal West Michigan winters.
Taking the time to test everything properly now prevents small headaches from turning into major disasters later. A tiny drip can become a flooded basement, and a small air leak will quietly inflate your energy bills. Let's walk through the right way to get your system online safely.
Powering Up and Leak Checking
It's time to bring your new humidifier to life. Follow these steps exactly—it's a specific sequence for a reason.
- Turn on the Water: Go back to the saddle valve on your water pipe. Slowly turn the handle counter-clockwise until it's fully open. You should hear the quiet sound of water filling the supply line.
- Check for Water Leaks: Right away, get your eyes on every single connection point. Look closely at the saddle valve, the fitting on the humidifier's solenoid, and the drain line connection. If you spot even one drop of water, turn the supply off immediately and snug up that connection.
- Restore Furnace Power: Now, head to your electrical panel and flip the breaker for your furnace back to the "on" position.
With both power and water supplied, it's time to see it run. Go to your main thermostat and turn the heat up a few degrees to get the furnace to kick on. Next, find your new humidistat and crank the setting all the way up. You should hear a solid "click" from the solenoid valve as it opens, and water will start flowing over the evaporator panel inside the unit.
This is also your chance to check for air leaks. Run your hand along all the seams you sealed around the unit and any bypass ducting. If you feel any air escaping, you'll need to power everything down later and apply another layer of duct sealant once the system has cooled off.
Calibrating Your Humidistat for West Michigan Winters
Okay, it works! Now you need to set the humidity level correctly. A classic rookie mistake is setting it way too high, which leads to condensation streaming down your windows. This is a super common problem here in Hudsonville and Jenison from November through April.
The rule of thumb is simple: the colder it is outside, the lower your indoor humidity setting needs to be. This keeps the warm, moist indoor air from condensing on those ice-cold windowpanes.
Here’s a great starting point for dialing it in:
| Outside Temperature | Recommended Indoor Humidity |
|---|---|
| Above 20°F | 35% – 40% |
| 10°F to 20°F | 30% – 35% |
| 0°F to 10°F | 25% – 30% |
| Below 0°F | 20% – 25% |
Set your humidistat based on the current outdoor temperature. Just keep an eye on your windows for the first few days. If you see any moisture building up, dial the setting back a bit.
Creating a Simple Maintenance Schedule
Your whole-home humidifier isn't a "set it and forget it" kind of appliance. But the good news is, a little bit of annual care is all it takes to keep it running like a top for years to come.
Interestingly, North America leads the world in humidifier adoption, accounting for 45% of the market's revenue in 2023. This is largely because our HVAC infrastructure is perfectly suited for these systems. While a professionally installed, EPA-certified unit can reduce allergy symptoms by up to 25%, a DIY job gone wrong has a 10-15% chance of causing mold issues. You can read more about the global active humidifier market to see why proper upkeep is so critical.
Here’s your simple annual checklist:
- Replace the Evaporator Panel: This is the big one. It's also called a water panel or filter. Do it once a year, right before the heating season kicks in each fall (around November).
- Clean the Unit: While you have the cover off, wipe down the inside of the housing to get rid of any mineral scale or buildup.
- Check the Drain Line: Make sure the drain line is clear and isn't clogged with gunk. A blockage here can cause a nasty overflow.
For homeowners in Grandville, Walker, Standale, Allendale, Wyoming, or anywhere else in our neck of the woods, we offer maintenance plans that take care of all this for you. Check out our professional humidifier service to keep your system in perfect shape without lifting a finger.
Knowing When to Call a Professional
Even the most determined DIYer has a project that meets its match. Knowing when to put the tools down and call a pro isn't failure—it's just plain smart. While installing a bypass humidifier is a doable weekend project for many, some situations are a clear signal that it's time to bring in an expert to get your whole-home humidifier installed safely and correctly.
Let's be honest. If you aren't 100% confident messing with electrical wiring or plumbing, this is a job to outsource. A tiny mistake with a water line can cause thousands in damage before you even notice it. And frying your furnace's control board with the wrong wiring? That's a very, very expensive fix.
Scenarios That Demand a Pro
Some HVAC systems and humidifier types are just too complex for a typical DIY installation. If you run into any of these, calling a professional is your safest and best move.
- High-Efficiency or Variable-Speed Systems: These newer furnaces aren't simple on/off machines. They have sophisticated control boards and run cycles that a poorly wired humidifier can throw completely out of whack, potentially even voiding your warranty.
- Steam Humidifier Installation: This is a different league from bypass units. Steam humidifiers need a dedicated high-voltage electrical circuit and more involved plumbing connections. This is definitely not a DIY-friendly task.
- Limited Access or Tricky Ductwork: Is your furnace crammed into a tight crawlspace? Is your ductwork a maze that's hard to get to? A pro has seen it all and has the right tools and experience to navigate those tight spots without issue.
For homeowners here in West Michigan—from Hudsonville and Jenison over to Wyoming, Grandville, Walker, Standale, and Allendale—calling a team like Platinum Heating & Cooling gives you total peace of mind. Our technicians make sure everything is up to code, dial in your system for peak performance, and take the risk of costly mistakes completely off your plate. We get it done right the first time.
Common Humidifier Questions
Even with a full guide, you're bound to have a few questions pop up. It's totally normal. Here are some of the most common things we hear from homeowners in West Michigan when they're thinking about a whole-home humidifier.
Can I Install a Humidifier on Any Furnace?
For the most part, yes. Most forced-air furnaces—whether they're gas, electric, or oil—play nicely with bypass and fan-powered humidifiers. Where you need to be careful is with newer high-efficiency or variable-speed systems. Their control boards are more complex, and you can run into trouble if the wiring isn't just right. Best bet? Always check your furnace manual first, and if you're not 100% sure, that's a sign to call a pro.
Hot or Cold Water Line Connection?
Always go with the hot water line. This is a tip we give every homeowner. Hot water evaporates way more easily and efficiently than cold water. It's a simple choice that makes a big difference in how much moisture your unit can actually put into the air. As a bonus, it helps cut down on the mineral scale that builds up on the evaporator panel, which means it works better for longer.
In a West Michigan winter, which usually runs from November through April, the sweet spot for indoor humidity is between 30% and 40%. It’s a balancing act—too dry and your skin and sinuses will feel it, but too high and you'll see condensation on your windows when it gets cold outside.
What Is the Ideal Winter Humidity Level?
There isn't one single perfect number. The right setting actually changes with the outdoor temperature. Think of it as a moving target.
A good rule of thumb is to turn down your humidistat as the temperature outside drops. This prevents that pesky, and potentially damaging, moisture from collecting on your windows. Getting this balance right is the secret to staying comfortable without creating new problems like mold or rot.
If you're ready to stop dealing with dry winter air and want the job done right, we're here to help. For a perfect installation in West Michigan—including Hudsonville, Jenison, Grandville, Walker, Standale, Allendale, & Wyoming, Michigan—you can count on the certified techs at Platinum Heating & Cooling.
Get your professional humidifier installation scheduled today at https://platinumheatingmi.com.